How to Make a Photoshop Resume Template (Free Resume Download)

Looking for a professional resume template to get that dream job? This step-by-step tutorial is easy to follow and includes a free resume template for you to download!
Learn how to design this Photoshop resume template and impress your employers. This simple resume template is based on an easy grid structure with only two columns that will help you section out your information. We’ll learn to use Paragraph Styles to format the resume template and discover how to create grids.
In this tutorial, we are also including a free resume template for download—bonus!
What You Will Need
You'll need access to Adobe Photoshop—if you don't have the software, you can download a trial from the Adobe website. For this tutorial, we will be using Montserrat from Google Fonts. Install the font on your system, and when you are ready, we can dive in!
1. Setting Up a Photoshop Resume Template
Step 1
In InDesign, go to File > New. Name the document Resume Template. Set the file to the following dimensions:
Width to 8.5 in
Height to 11 in
Orientation to Portrait
Resolution to 300 dpi
Color Mode to CMYK
Click Create.

Step 2
To create Guides, head over to View > New Guide Layout. In the New Guide Layout window, set the Columns Number to 8 and the Gutter to 0.25 in.
Check the Margin option and set all sides to 0.5 in. Click OK.

Check the Margin option and set all sides to 0.5 in. Click OK.
Step 3
On the Toolbar, select the Rectangle Tool (U). Draw a rectangle that covers three columns on the left side of the Photoshop resume template.

Step 4
Head over to the Options bar. Click on Fill and open the Color Picker window. Use the color code #9cb1bf and click OK.

2. Setting Up Paragraph Styles on Your Photoshop Resume Template
Step 1
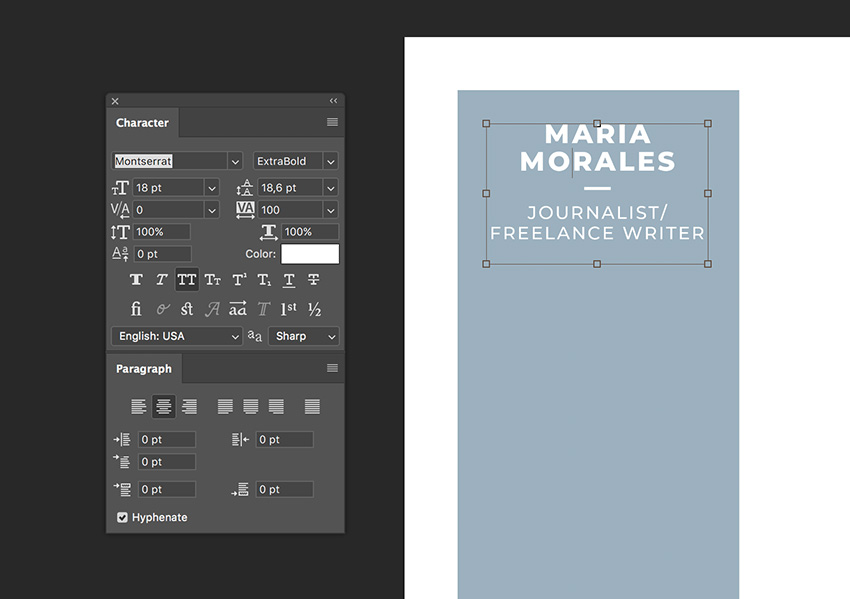
Select the Text Tool (T) from the Toolbar. Draw a text frame at the top of the rectangle and include a name and occupation. Open the Character and Paragraph panels. Set both sections to white and use the following style for the name section:
Font Family: Montserrat
Font Style: ExtraBold
Size: 18 pt
Leading: 18.6 pt
Tracking: 100
Use the following style for the occupation section:
Font Family: Montserrat
Font Style: Medium
Size: 12 pt
Leading: 14 pt
Tracking: 100
On the Paragraph panel, set the text to Align Center.
Step 2
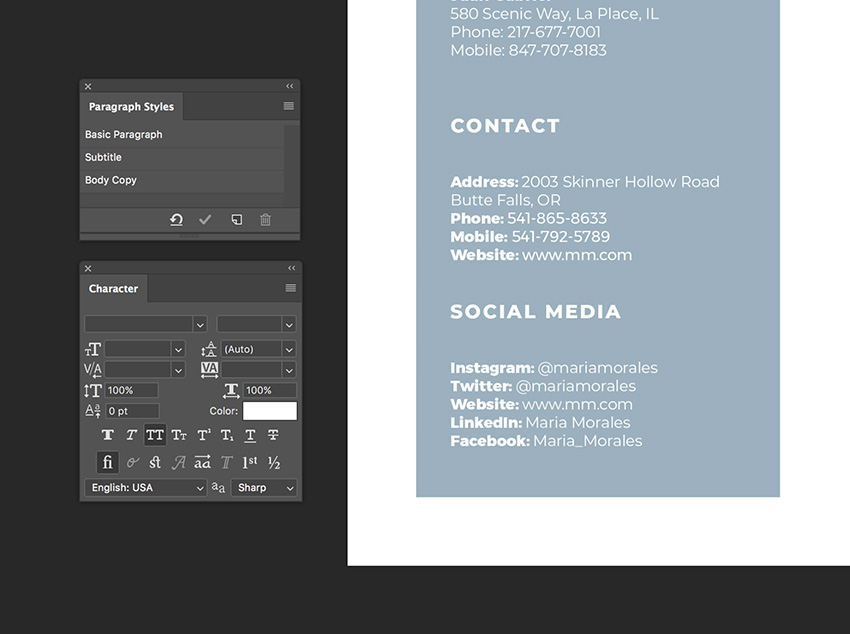
Open the Paragraph Styles panel by going to Window > Paragraph Styles.
On the Paragraph Styles panel, select the main menu and click on New Paragraph Style.

On the Paragraph Styles panel, select the main menu and click on New Paragraph Style.
Step 3
Double-click on Paragraph Style 1 to open the Paragraph Styles Options window.
Set the Style Name to Subtitle and use the following settings:
Set the Style Name to Subtitle and use the following settings:
Font Family: Montserrat
Font Style: ExtraBold
Size: 10 pt
Tracking: 100
Case: All Caps
Click OK.

Step 4
On the Paragraph Styles panel, select the main menu and click on New Paragraph Style.
Double-click on Paragraph Style 1 to open the Paragraph Styles Options window.
Set the Style Name to Body Copy and use the following settings:
Double-click on Paragraph Style 1 to open the Paragraph Styles Options window.
Set the Style Name to Body Copy and use the following settings:
Font Family: Montserrat
Font Style: Regular
Size: 8 pt
Tracking: -5
Click OK.

3. Designing Your Resume Template in Photoshop
Step 1
Using the Text Tool (T), create a text box to include the Profile section.
Using the Paragraph Styles panel, format the text box with the Subtitle and Body Copy styles.
Using the Character panel, set the color to White.

Using the Paragraph Styles panel, format the text box with the Subtitle and Body Copy styles.
Using the Character panel, set the color to White.
Step 2
Duplicate the frame by pressing Option-Shift and dragging. Rename this section References and add copy.

Step 3
Duplicate the frame two more times by pressing Option-Shift and dragging. Rename the two new sections Contact and Social Media. Add copy and use the Paragraph Styles panel to format the content.
Step 4
On the Layers panel, select the text used on the sidebar. Click on the Group button to create a folder.
Double-click on the folder to rename it to Sidebar Text.

Double-click on the folder to rename it to Sidebar Text.
Step 5
From the top Ruler (Command-R), create a guide at the same height as the name.

Step 6
Using the Text Tool (T), add a text box opposite the sidebar. Place it under the guide we created—this will be the Education section.
Use the Paragraph Styles panel to format it with the Subtitle style. On the Character panel, set the color to #9cb1bf.

Use the Paragraph Styles panel to format it with the Subtitle style. On the Character panel, set the color to #9cb1bf.
Step 7
Create a text box under the subtitle that fits one column—this will contain dates.
Set the style to Body Copy on the Paragraph Styles panel.
On the Character panel, set the Font Style to ExtraBold and the color to #9cb1bf.

Set the style to Body Copy on the Paragraph Styles panel.
On the Character panel, set the Font Style to ExtraBold and the color to #9cb1bf.
Step 8
Create a text box to the right of the frame above. Extend this to the right margin. Add copy related to education.
Using the Paragraph Styles panel, set all the copy to the Body Copy style.
The first two lines containing the school and programs will be highlighted differently. On the Character panel, set the first two lines of each sub-section in the ExtraBold family and set the color to #9cb1bf.

Step 9
Select the three text frames we created on the steps above. Press Shift-Command and drag downwards.
Replace the body copy and the subtitle that reads Education for Experience.

Replace the body copy and the subtitle that reads Education for Experience.
Step 10
Using the Text Tool (T), create an additional text frame under the Experience section. Call this one Skills and add copy. Use the Paragraph Styles panel to format the text.

Step 11
On the Layers panel, select all the text layers created on the right side of the resume template. Click on the Group button. Double-click on the folder to rename it to Regular Content.

Step 12
Using the Line Tool (U), we will create strokes under each subtitle.
Let’s start with the Profile section. Create a line under Profile. Head over to the Options bar and set the Fill to White. Set the Width to 645 px and the Height to 1 pt.

Let’s start with the Profile section. Create a line under Profile. Head over to the Options bar and set the Fill to White. Set the Width to 645 px and the Height to 1 pt.
Step 13
Duplicate the stroke by pressing Shift-Command and dragging. Place one under each subtitle on the sidebar.

Step 14
Duplicate the stroke to the right side of the page. Head over to the Options bar and change the Fill to Black. Set the Width to 1380 px.
Duplicate the stroke to place lines under each section on the right side.

Duplicate the stroke to place lines under each section on the right side.
On the Layers panel, create a folder to include all the strokes.

4. How to Export a Resume Template for Printing
Step 1
You can print a file from Photoshop by going to File > Print. Click Print.
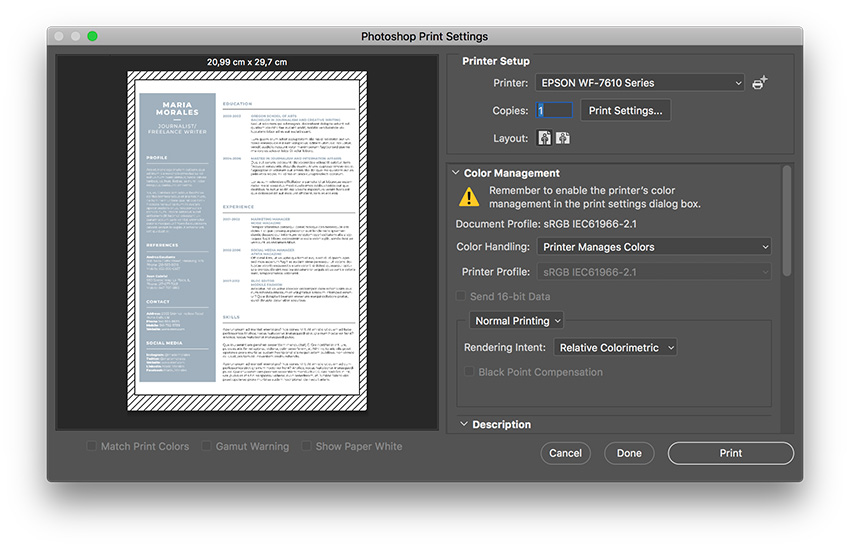
Step 2
You can also export a file as a PDF for online distributing or printing. Head over to File > Save As. In the Save As option window, name the document Resume Template. Set the format to Photoshop PDF and click Save.

In the Save Adobe PDF option window, set the Adobe PDF Preset to High-Quality Print.
Click Save PDF.

In the Save Adobe PDF option window, set the Adobe PDF Preset to High-Quality Print.
Click Save PDF.
Great Job! You’ve Finished Your Photoshop Resume Template!
In this tutorial, you learned how to make a professional resume template in Photoshop. You mastered important tools that will help you edit your free resume template and use it multiple times. Today, you learned to:
set up a ready-to-print Photoshop file add margins and column guides. Use Paragraph Styles to format typography
> export a PDF file.
Boom!
Comments
Post a Comment